Difference between revisions of "Ingrid/Blogs"
| (99 intermediate revisions by 3 users not shown) | |||
| Line 1: | Line 1: | ||
==Features== | ==Features== | ||
| − | + | ||
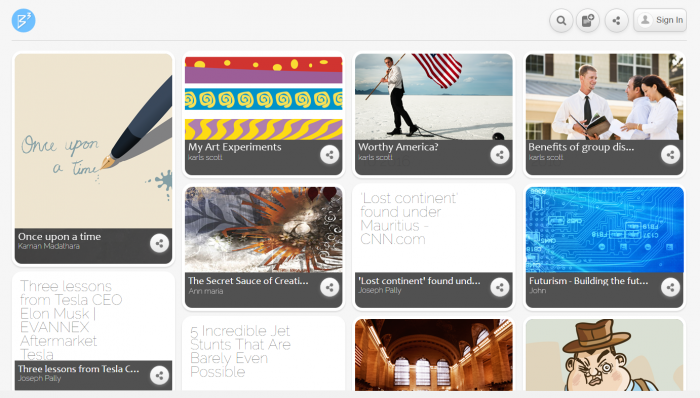
| − | + | '''Ingrid Blogs''' facilitates the user to express/share different views and ideas with the outer world. | |
| − | * | + | |
| − | * | + | B3 can be private or public(default). All public blogs can be viewed in the B3 home page. |
| − | + | *'''HTML Editor''' | |
| − | * | + | *'''Draft''' - Automatically draft the content. Thus user wont loose any of the content while creating. |
| − | + | *'''File Uploads''' - Allows the user to upload images, videos, URL's, experiences, any document attachments etc. along with the text content in a blog | |
| − | + | *'''Share''' - Options like 'Like', 'Dislike', 'Comment' facilitate the user to express his views about the blog. The blog can be shared by posting it to Ingrid slate, Facebook, Twitter and Google+. User can also share the blog by sending it as an email to different people. | |
| − | + | *'''Hashtags''' - Hashtags enable the user to access all the blogs with same hashtags. | |
| − | + | *'''Channels''' - Users are allowed to post blogs to appropriate channels. Channels can be accessed from channels.zcubes.com . | |
| − | * | + | |
| − | + | [[File:B3.png|700px|thumb|center|Ingrid blogs]] | |
| − | |||
==Create Blogs== | ==Create Blogs== | ||
| − | + | 1. Access B3 by '''b3.zcubes.com''' | |
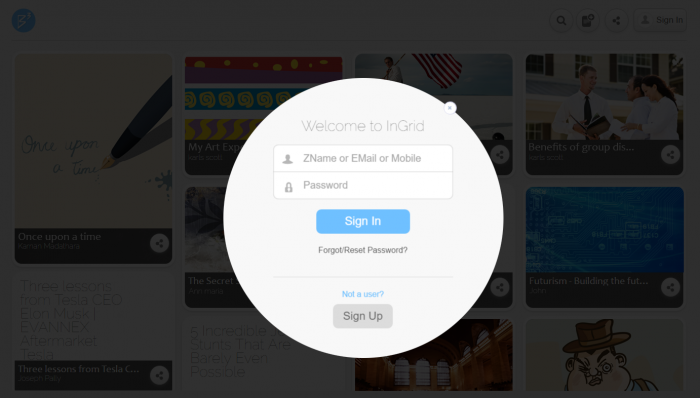
| − | + | 2. '''Log in''' to B3 to start creating blogs. | |
| − | + | [[File:Log_in.png|700px|thumb|center|Sign In]] | |
| − | + | ||
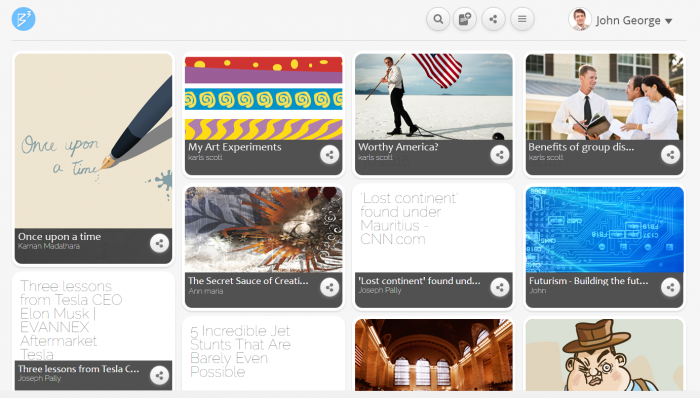
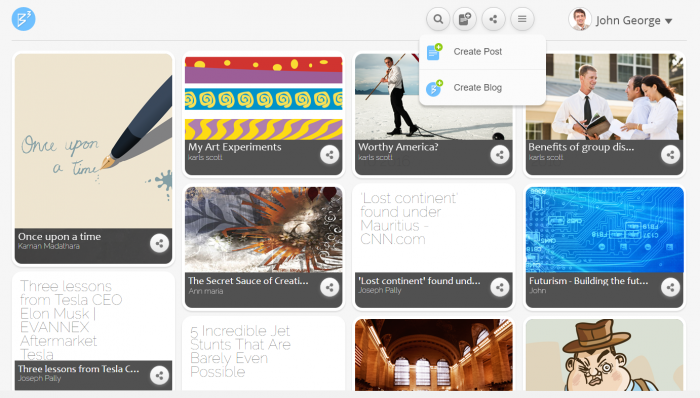
| − | + | 3. Once logged in, click on '''Menu icon''' on the right top corner to see the option '''Create Blog''' | |
| − | + | [[File:After_login_1.png|700px|thumb|center|Blog Home]] | |
| − | + | ||
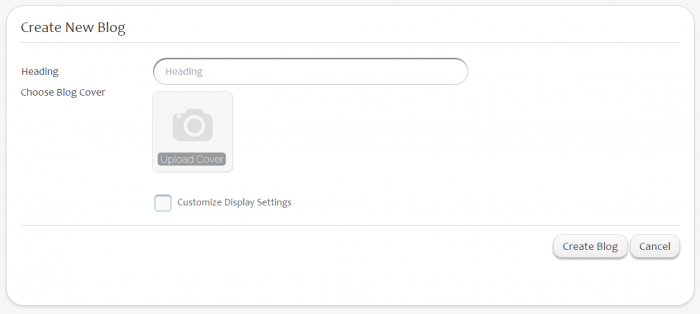
| − | + | 4. '''Create New Blog''' page have the Heading, Choose Blog Cover, Customize Display Settings as fields. | |
| − | + | [[File:Create_Blog.png|700px|thumb|center|Create Blog]] | |
| − | [[File: | + | |
| + | 5. To alter display setting, check on '''Customize Display Settings''' option and click '''Next'''. | ||
| + | |||
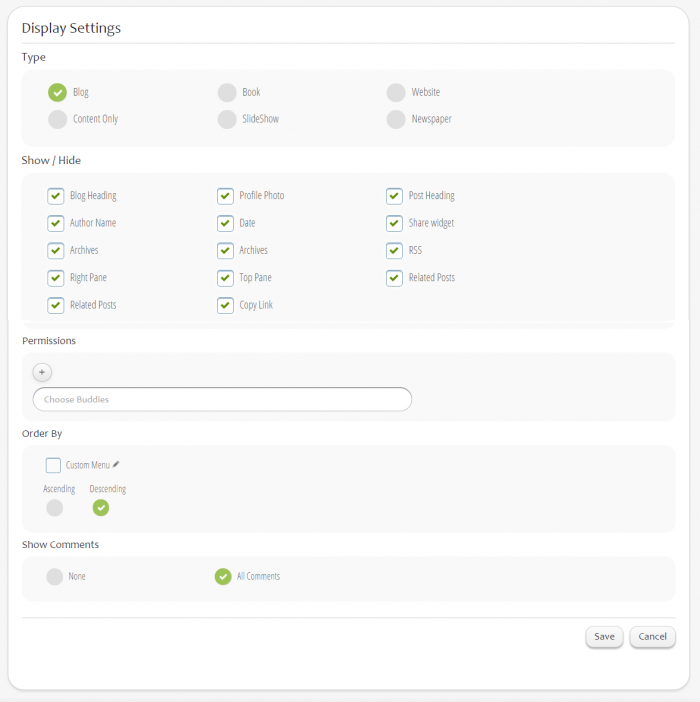
| + | 6. '''Show/Hide''' settings allows users to'''select/deselect''' various Blog display options on this page. | ||
| + | [[File:Blog_Display_Settings_.png|700px|thumb|center|Display Settings]] | ||
| + | |||
| + | 7. '''Share Permission''' settings allows users to choose buddies to edit the blog content | ||
| + | |||
| + | 8. '''Order By''' settings allows the users to sort the blog posts in Ascending/Descending order according to the created dates. | ||
| + | |||
| + | 9. '''Show Comments''' allows the users to disable the comments visibility. Select '''None''' option under 'Show Comments' to show no comments. | ||
| + | |||
| + | 10. '''Save''' the settings through 'Save' button to start creating blog posts. It will redirect to '''Create New Blog Posting''' page. | ||
| + | |||
| + | If the user does not select '''Customize Display Settings''' option, then it will automatically redirect to create blog post page. | ||
| + | [[File:Create_new_post.png|700px|thumb|center|Create Blog Post]] | ||
| + | |||
| + | ==Menu== | ||
| + | |||
| + | [[File:Menu_B3.png|700px|thumb|center|Menu]] | ||
==Blog Display Settings== | ==Blog Display Settings== | ||
| − | + | User can alter the display settings by selecting the '''Customize Display Settings''' option. By selecting 'Next' button, it leads to 'Display Settings' page that allows the user to select/deselect various Blog display options. | |
| − | + | ||
| − | * | + | [[File:Blog_Display_Settings_.png|700px|thumb|center|Display Settings]] |
| − | [[File: | + | |
| + | *'''Show/Hide''' | ||
| + | <font color=blue>Need to insert an image indicating all items/sections such as Blog heading, Right pane, Top pane, Archives etc under Show/Hide</font> | ||
| + | #'''Blog Heading''' : Enables/Disables the display of heading of the blog for all the posts added under that particular blog. | ||
| + | #'''Author Name''' : Enables/Disables the display of name of the author/user who created the blog. | ||
| + | #'''Archives''' : Archives gives the list of all other postings under the currently open blog. By selecting the Show/Hide option, user can enable/disable the display of Archives pane. | ||
| + | #'''Profile photo''' : Enables/Disables the display of the blog author's profile photo to the blog viewers. | ||
| + | #'''Date''' : Enables/Disables the display of date on which the posts under particular blog were added. | ||
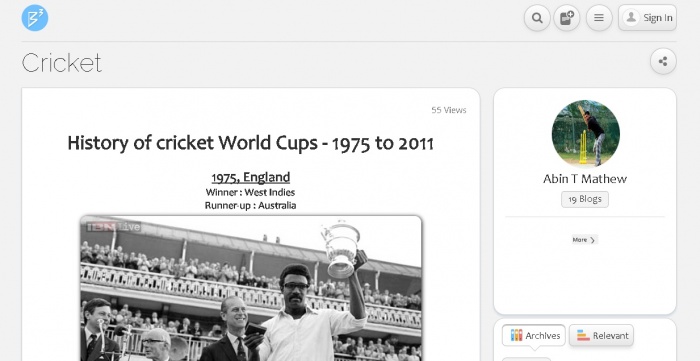
| + | #'''Right Pane''' : Enables/Disables the display of pane on the right hand side which displays the blog author's details such as name, profile photo and number of blogs created by the author. | ||
| + | #'''Post Heading''' : Enables/Disables the display of headings of all posts under a particular blog. | ||
| + | #'''Cubee Control''' : Enables/Disables the display of the controls such as 'Like', 'Dislike', 'Share', 'Track/Delete' and 'Comments'. User and viewers both can use these controls to express their views about the blog post. | ||
| + | #'''Top Pane''' : Enables/Disables the display of top pane that includes - 'Blog Heading', 'Search window', 'Share' icon, 'Live blogs' and 'Drafts' button, 'Display settings' icon, 'New post', 'Home' and 'Ingrid blogs' icon and a 'Back' button. | ||
| + | If the user is on Blog listing page, instead of 'Live blogs' and 'Drafts' buttons, 'Views' option is enabled/disabled showing how many times the blog has been viewed. | ||
| + | |||
| + | *'''Sort by Date''' | ||
| + | - User can sort the display of blog posts in ascending/descending order of dates created. | ||
| + | |||
| + | *'''Show Comments''' | ||
| + | - User can enable/disable the option of display of blog comments to all the viewers. | ||
| + | - In order to disable the comments visibility,'''None''' option have to be selected. | ||
| + | |||
| + | ==Blog Types / Blog Modes== | ||
| + | *Blog Mode | ||
| + | [[File:Blog_Mode.jpg|700px|thumb|center|Blog Mode]] | ||
| + | *Book Mode | ||
| + | [[File:Book_Mode.jpg|700px|thumb|center|Book Mode]] | ||
| + | *Website Mode | ||
| + | [[File:Website_Mode.jpg|700px|thumb|center|Website Mode]] | ||
| + | *Content Only | ||
| + | [[File:Content Only Mode.jpg|700px|thumb|center|Content Only Mode]] | ||
| + | *Slideshow | ||
| + | [[File:Slideshow_Mode.jpg|700px|thumb|center|Slide Show Mode]] | ||
| + | *Newspaper Mode | ||
| + | [[File:Newspaper.jpg|700px|thumb|center|Newspaper Mode]] | ||
==Create Blog Post== | ==Create Blog Post== | ||
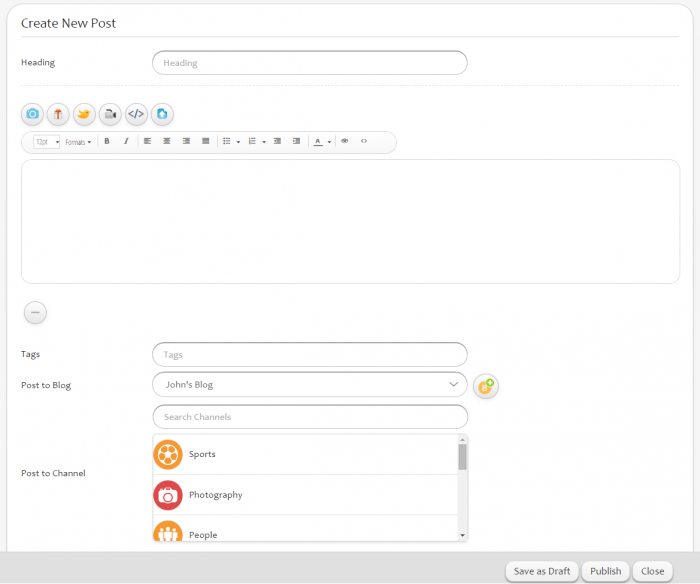
| − | + | Once the blog is created, user will be redirected to '''Create New Blog Posting''' page. | |
| − | + | [[File:Create_new_post.png|700px|thumb|center|Create Blog Post]] | |
| − | + | ||
| − | + | *'''Heading''' | |
| − | + | *'''HTML Editor''' | |
| − | + | *'''Tags''' | |
| − | [[File: | + | *'''Post to Channels''' |
| + | *'''Draft''' | ||
| + | *'''Publish''' | ||
| + | |||
| + | ---<font color=blue>Need to include 'New post' icon image</font>--- | ||
==View Blogs== | ==View Blogs== | ||
| − | + | Click on the '''Home Button''' | |
| − | + | Select '''My Blogs''' to access the B3 posts. | |
| − | + | ||
| − | [[File: | + | [[File:Viewblog.png|700px|thumb|center|Menu in Blog Home]] |
| + | |||
| + | All the b3 post created are listed in '''My Blogs''' page. | ||
| + | |||
| + | <font color= blue>Need to insert User's blog home page image (with some blogs added on the page)</font> | ||
| + | |||
| + | ==Edit Blogs== | ||
| + | |||
| + | Access '''My Blogs''' from the main menu. | ||
| + | Click on the edit button. | ||
| + | |||
| + | |||
| + | [[File:Edit_Blog.png|700px|thumb|center|Edit Blog]] | ||
| + | |||
| + | User can also delete any of the blog posting or the complete blog, by clicking on the '''Delete''' icon besides the 'Edit' icon. | ||
| + | |||
| + | <font color=blue>Need to insert an image indicating edit and delete blog icons</font> | ||
| + | |||
| + | ==Edit Post== | ||
| + | B3 post can be edited either from | ||
| + | Blog post listing page | ||
| + | Blog View page | ||
| + | [[File:Edit_Post.png|700px|thumb|center|Edit Post]] | ||
| + | |||
| + | ==Share Blogs== | ||
| + | ---<font color=blue>Need to include an image indicating 'Share blog' icon</font>--- | ||
| + | |||
| + | '''Share blog''' icon is used to share the blogs. | ||
| + | |||
| + | [[File:Share.png|700px|thumb|center|Share Blogs]] | ||
| + | It can be accessed from the | ||
| + | 1) Top right corner | ||
| + | 2) '''Cubee Control''' option at the bottom of the blog contents | ||
| + | |||
| + | Blog Sharing : | ||
| + | |||
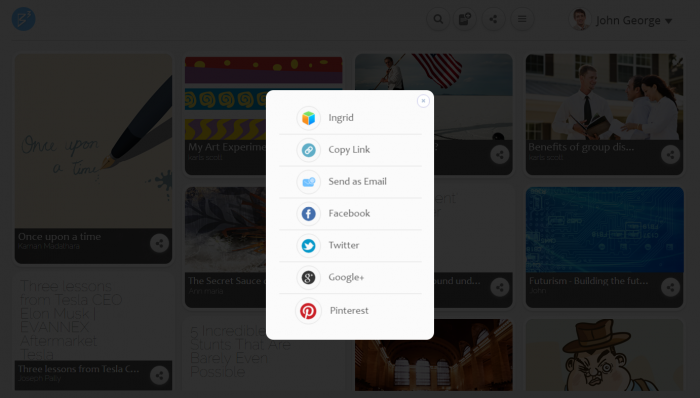
| + | 1)'''Ingrid Slate''': By selecting Ingrid option, user can share the blog by posting on Slate, or posting to a particular group, or sending as a Zmail. | ||
| + | 2)'''As a Permalink''' : A URL is created for the blog post which can be copied and shared. | ||
| + | 3)'''By sending as an email''' : Can be shared by entering the receivers email address. | ||
| + | 4)'''Facebook''' | ||
| + | 5)'''Twitter''' | ||
| + | 6)'''Google+''' | ||
| + | |||
| + | <<[[Ingrid | Ingrid home ]] | ||
Latest revision as of 02:13, 7 February 2017
Features
Ingrid Blogs facilitates the user to express/share different views and ideas with the outer world.
B3 can be private or public(default). All public blogs can be viewed in the B3 home page.
- HTML Editor
- Draft - Automatically draft the content. Thus user wont loose any of the content while creating.
- File Uploads - Allows the user to upload images, videos, URL's, experiences, any document attachments etc. along with the text content in a blog
- Share - Options like 'Like', 'Dislike', 'Comment' facilitate the user to express his views about the blog. The blog can be shared by posting it to Ingrid slate, Facebook, Twitter and Google+. User can also share the blog by sending it as an email to different people.
- Hashtags - Hashtags enable the user to access all the blogs with same hashtags.
- Channels - Users are allowed to post blogs to appropriate channels. Channels can be accessed from channels.zcubes.com .
Create Blogs
1. Access B3 by b3.zcubes.com
2. Log in to B3 to start creating blogs.
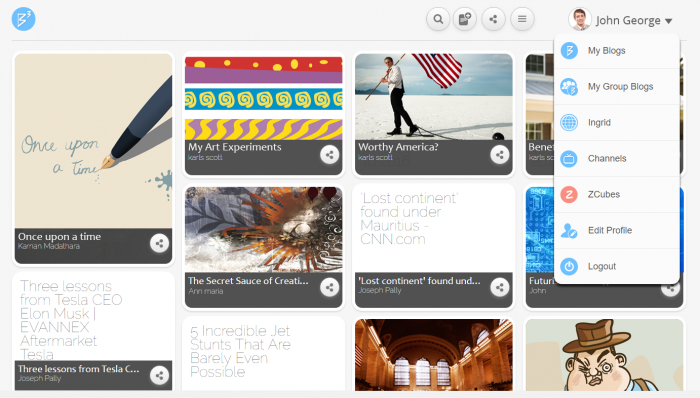
3. Once logged in, click on Menu icon on the right top corner to see the option Create Blog
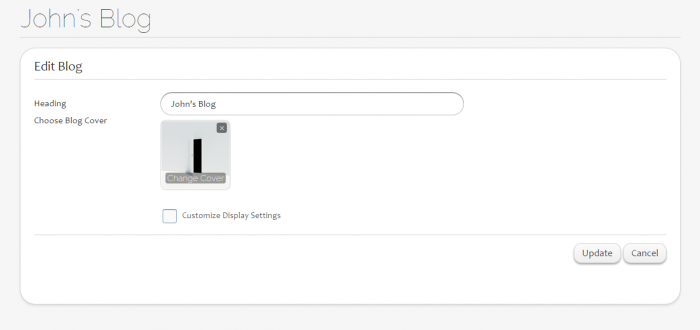
4. Create New Blog page have the Heading, Choose Blog Cover, Customize Display Settings as fields.
5. To alter display setting, check on Customize Display Settings option and click Next.

6. Show/Hide settings allows users toselect/deselect various Blog display options on this page.
7. Share Permission settings allows users to choose buddies to edit the blog content
8. Order By settings allows the users to sort the blog posts in  Ascending/Descending order according to the created dates.

9. Show Comments allows the users to disable the comments visibility. Select None option under 'Show Comments' to show no comments.
10. Save the settings through 'Save' button to start creating blog posts. It will redirect to Create New Blog Posting page.
If the user does not select Customize Display Settings option, then it will automatically redirect to create blog post page.
Menu
Blog Display Settings
User can alter the display settings by selecting the Customize Display Settings option. By selecting 'Next' button, it leads to 'Display Settings' page that allows the user to select/deselect various Blog display options.
- Show/Hide
Need to insert an image indicating all items/sections such as Blog heading, Right pane, Top pane, Archives etc under Show/Hide
- Blog Heading : Enables/Disables the display of heading of the blog for all the posts added under that particular blog.
- Author Name : Enables/Disables the display of name of the author/user who created the blog.
- Archives : Archives gives the list of all other postings under the currently open blog. By selecting the Show/Hide option, user can enable/disable the display of Archives pane.
- Profile photo : Enables/Disables the display of the blog author's profile photo to the blog viewers.
- Date : Enables/Disables the display of date on which the posts under particular blog were added.
- Right Pane : Enables/Disables the display of pane on the right hand side which displays the blog author's details such as name, profile photo and number of blogs created by the author.
- Post Heading : Enables/Disables the display of headings of all posts under a particular blog.
- Cubee Control : Enables/Disables the display of the controls such as 'Like', 'Dislike', 'Share', 'Track/Delete' and 'Comments'. User and viewers both can use these controls to express their views about the blog post.
- Top Pane : Enables/Disables the display of top pane that includes - 'Blog Heading', 'Search window', 'Share' icon, 'Live blogs' and 'Drafts' button, 'Display settings' icon, 'New post', 'Home' and 'Ingrid blogs' icon and a 'Back' button.
If the user is on Blog listing page, instead of 'Live blogs' and 'Drafts' buttons, 'Views' option is enabled/disabled showing how many times the blog has been viewed.
- Sort by Date
- User can sort the display of blog posts in ascending/descending order of dates created.
- Show Comments
- User can enable/disable the option of display of blog comments to all the viewers.
- In order to disable the comments visibility,None option have to be selected.
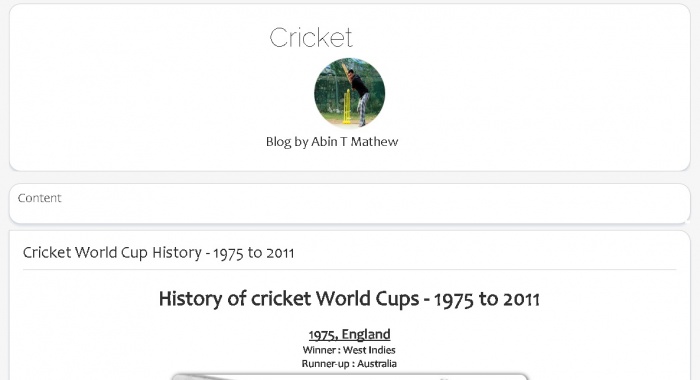
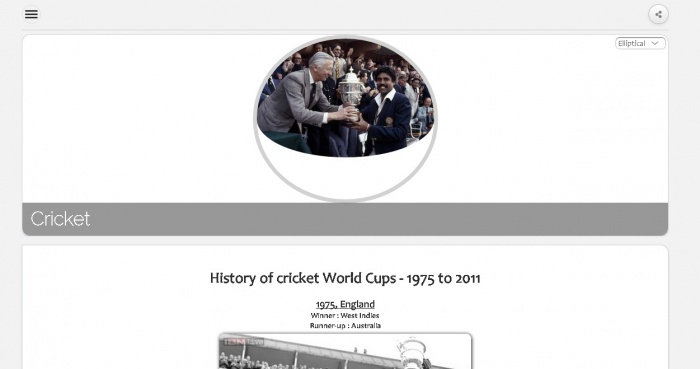
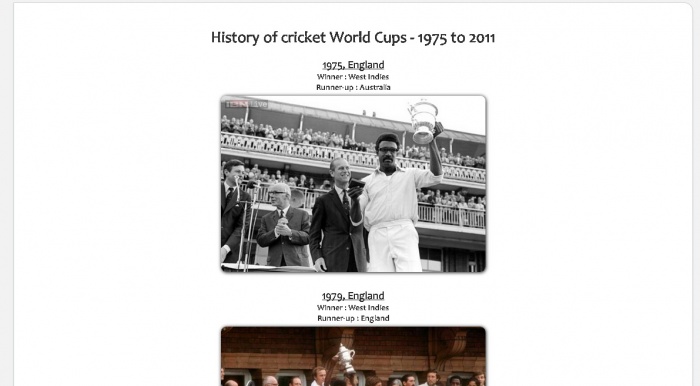
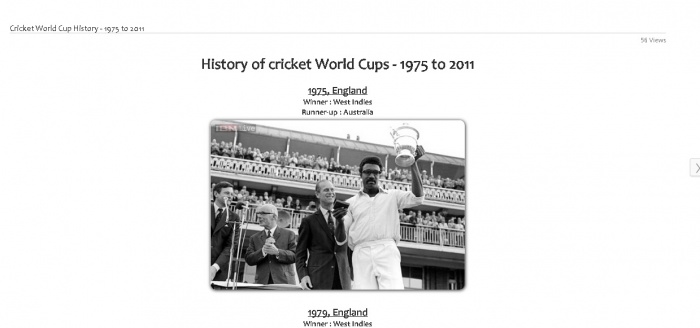
Blog Types / Blog Modes
- Blog Mode
- Book Mode
- Website Mode
- Content Only
- Slideshow
- Newspaper Mode
Create Blog Post
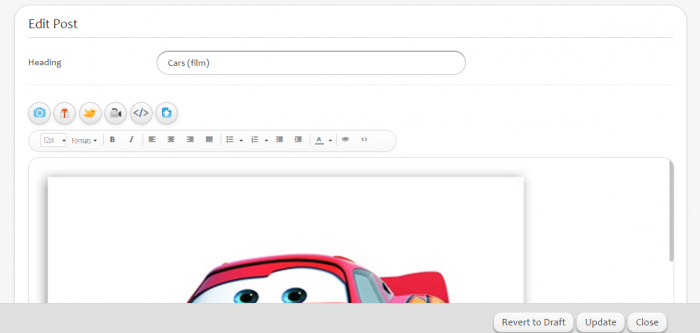
Once the blog is created, user will be redirected to Create New Blog Posting page.
- Heading
- HTML Editor
- Tags
- Post to Channels
- Draft
- Publish
---Need to include 'New post' icon image---
View Blogs
Click on the Home Button
Select My Blogs to access the B3 posts.
All the b3 post created are listed in My Blogs page.
Need to insert User's blog home page image (with some blogs added on the page)
Edit Blogs
Access My Blogs from the main menu.
Click on the edit button.
User can also delete any of the blog posting or the complete blog, by clicking on the Delete icon besides the 'Edit' icon.
Need to insert an image indicating edit and delete blog icons
Edit Post
B3 post can be edited either from
Blog post listing page
Blog View page
---Need to include an image indicating 'Share blog' icon---
Share blog icon is used to share the blogs.
It can be accessed from the
1) Top right corner
2) Cubee Control option at the bottom of the blog contents
Blog Sharing :
1)Ingrid Slate: By selecting Ingrid option, user can share the blog by posting on Slate, or posting to a particular group, or sending as a Zmail.
2)As a Permalink : A URL is created for the blog post which can be copied and shared.
3)By sending as an email : Can be shared by entering the receivers email address.
4)Facebook
5)Twitter
6)Google+
<< Ingrid home
