Difference between revisions of "Ingrid/Blogs"
| Line 140: | Line 140: | ||
---<font color=blue>Need to include an image indicating 'Share blog' icon</font>--- | ---<font color=blue>Need to include an image indicating 'Share blog' icon</font>--- | ||
| − | User can share any blog through 'Share blog | + | User can share any blog through 'Share blog' icon placed - |
1) on the top right hand corner of the blog page or | 1) on the top right hand corner of the blog page or | ||
Revision as of 15:38, 7 May 2014
Features
Ingrid Blogs facilitates the user to express/share different views and ideas with the outer world.
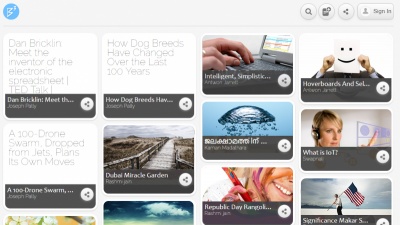
Blogs can be private or public and can be related to any topic. A blog by default is 'Public' and all live public blogs can be viewed in Tiled or Listed format.
Blogs can be created under different categories depending on the topic. HTML editor helps the user to set or modify the display format of the blog contents. While editing, the incomplete blog post can be saved as a draft through Save as Draft button. It allows the user to upload images, videos, URL's, experiences, any document attachments etc. along with the text content in a blog. New blogs with the related topics can be added under a same blog heading through Create new blog posting option.
While viewing a blog, the options like 'Like', 'Dislike', 'Comment' facilitate the user to express his views about the blog. The blog can be shared by posting it to Ingrid slate, Facebook, Twitter and Google+. User can also share the blog by sending it as an email to different people.
Create Blogs
- Log In
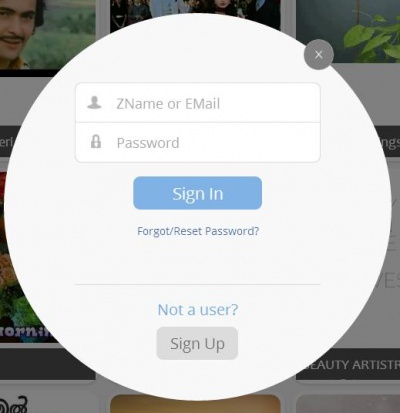
User can create blog by 'logging in' by selecting 'Ingrid' icon.
- Create New Blog
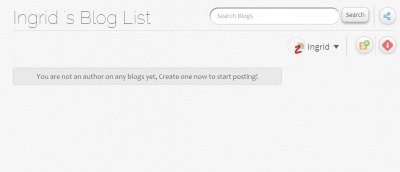
On logging in through Sign-Up page, My Grid page opens up. Through the 'Explore Ingrid' option on the upper right hand corner, select the Blogs feature. It will show up the User's Blog list page. Initially for the new user, there won't be any blogs listed. So in order to create a new blog, select B+ icon on the top right hand corner.
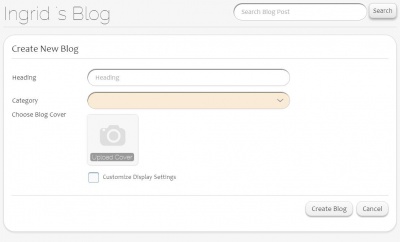
Create New Blog page opens up with options such as Heading, Category, Choose Blog Cover, Customize Display Settings. Enter the appropriate Blog Heading, Category and select the Blog Cover Image. Blog Heading is a mandatory field.
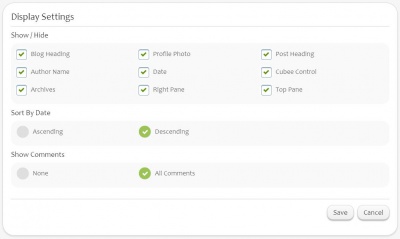
User can alter the display settings by selecting the 'Customize Display Settings' option. By selecting 'Next' button, it leads to Display Settings page that allows the user to select/deselect various Blog display options.
The list of User's blogs can be stored by sorting in Ascending/Descending order of dates created. In order to disable the comments visibility, select None option under 'Show Comments'.
- Saving the Blog
By saving the settings through 'Save' button, user will be redirected to Create New Blog Posting page.
If the user does not select 'Customize Display Settings' option, then the New Blog will be created by selecting 'Create Blog' button on the same page.
Blog Display Settings
User can alter the display settings by selecting the 'Customize Display Settings' option. By selecting 'Next' button, it leads to 'Display Settings' page that allows the user to select/deselect various Blog display options.
User can select/deselect different options under the headings 'Show/Hide', 'Sort by Date' and 'Show Comments' for displaying the newly created blog.
- Show/Hide
Need to insert an image indicating all items/sections such as Blog heading, Right pane, Top pane, Archives etc under Show/Hide
- Blog Heading : Enables/Disables the display of heading of the blog for all the posts added under that particular blog.
- Author Name : Enables/Disables the display of name of the author/user who created the blog.
- Archives : Archives gives the list of all other postings under the currently open blog. By selecting the Show/Hide option, user can enable/disable the display of Archives pane.
- Profile photo : Enables/Disables the display of the blog author's profile photo to the blog viewers.
- Date : Enables/Disables the display of date on which the posts under particular blog were added.
- Right Pane : Enables/Disables the display of pane on the right hand side which displays the blog author's details such as name, profile photo and number of blogs created by the author.
- Post Heading : Enables/Disables the display of headings of all posts under a particular blog.
- Cubee Control : Enables/Disables the display of the controls such as 'Like', 'Dislike', 'Share', 'Track/Delete' and 'Comments'. User and viewers both can use these controls to express their views about the blog post.
- Top Pane : Enables/Disables the display of top pane that includes - 'Blog Heading', 'Search window', 'Share' icon, 'Live blogs' and 'Drafts' button, 'Display settings' icon, 'New post', 'Home' and 'Ingrid blogs' icon and a 'Back' button. If the user is on Blog listing page, instead of 'Live blogs' and 'Drafts' buttons, 'Views' option is enabled/disabled showing how many times the blog has been viewed.
- Sort by Date
- User can sort the display of blog posts in ascending/descending order of dates created.
- Show Comments
- User can enable/disable the option of display of blog comments to all the viewers. In order to disable the comments visibility, 'None' option can be selected.
User could even use the blog as a website page by unchecking all the settings.
User can save the settings using 'Save' button, else can use 'Cancel' button to keep the default settings.
Display Settings page can be revisited using following ways -
1)Through the 'Settings' icon on the top of the blog page where all the related posts are listed.
2)Through the 'Settings' icon on the top of each individual post of a particular blog.
Create Blog Post
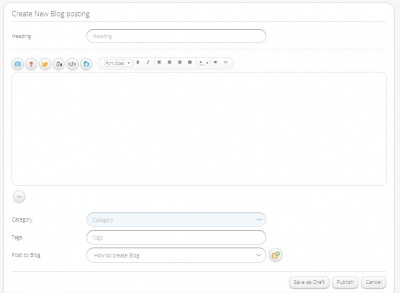
Once the blog is created, user will be directed to 'Create New Blog Posting' page.
This page consists of the 'Heading' section, 'Contents' section and 'Saving options' section. User can enter an appropriate heading for the post through 'Heading' window.
By selecting + icon below the 'Contents' section, user can also fill in the Category and Tags details. The current blog post can also be placed under any other user created blog, by selecting 'Post to Blog' option.
Along with the text contents for the post, user can -
-Share images
-Share gift images
-Share user created experiences
-Share videos
-Add HTML code
-Share documents
The first image or the video uploaded in the blog post is the default thumbnail image of the blog post.
The contents can be formatted using Edit bar options such as font size, font color, alignment, preview etc.
User can save the post at any time using Save as Draft button. Once the post is complete, user can publish the post through Publish button and will be available for viewing to other users on 'Ingrid Blogs' page.
Cancel button helps prevent the user from saving any changes done.
User can create any number of new blog posts using 'New Blog Post' icon at the top right corner of the blog page.
---Need to include 'New post' icon image---
View Blogs
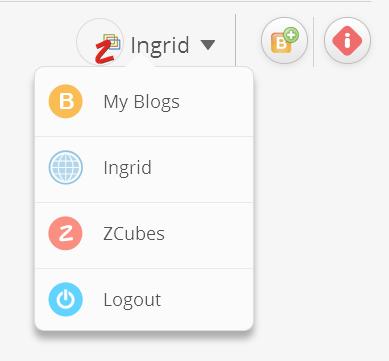
The Home button and 'My Blogs' option at the top right hand corner redirects to the user's Blogs home page.
On this page, a list of all blogs created by the user is available. All the postings under each blog heading can also be viewed by clicking on the blog.
Need to insert User's blog home page image (with some blogs added on the page)
The Ingrid button i at the top right hand corner redirects to the Ingrid Blogs public page.
Edit Blogs
User can anytime edit his own blogs using 'Edit icon' -
1)Through the blogs page where all the related posts are listed.
2)at the bottom right side of each individual post of a particular blog.
User can also delete any of the blog posting or the complete blog, by clicking on the Delete icon besides the 'Edit' icon. Ingrid will ask for the confirmation before deletion.
Need to insert an image indicating edit and delete blog icons
---Need to include an image indicating 'Share blog' icon---
User can share any blog through 'Share blog' icon placed -
1) on the top right hand corner of the blog page or
2) from the 'Cubee Control' option at the bottom of the blog contents
Blog can be shared by -
- Posting to Ingrid : By selecting Ingrid option, user can share the blog by posting on Slate, or posting to a particular group, or sending as a Zmail.
- As a Permalink : A URL is created for the blog post which can be copied and shared.
- By sending as an email : Can be shared by entering the receivers email address.
- Sharing on Facebook
- Sharing on Twitter
- Sharing on Google+
