Difference between revisions of "Websites"
Jump to navigation
Jump to search
| Line 3: | Line 3: | ||
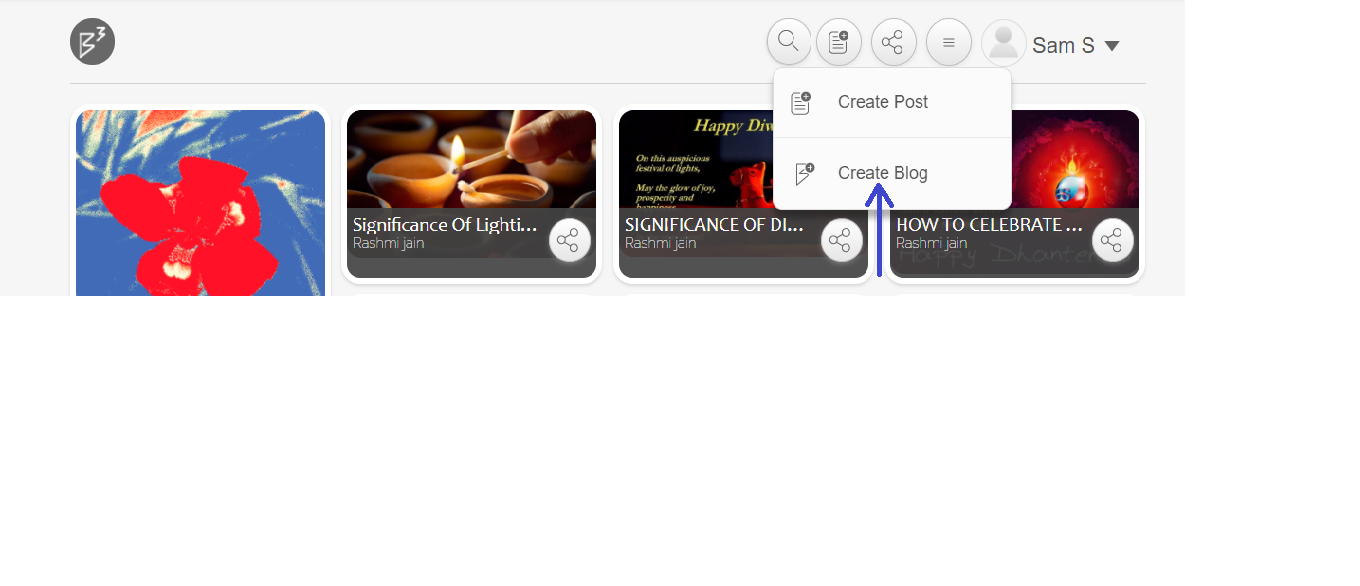
Step 1: Click on B^3 icon. Select 'New Blog' option as shown. | Step 1: Click on B^3 icon. Select 'New Blog' option as shown. | ||
| − | [[Image:Wiki_B3_Website3.png | + | [[Image:Wiki_B3_Website3.png]] |
| Line 9: | Line 9: | ||
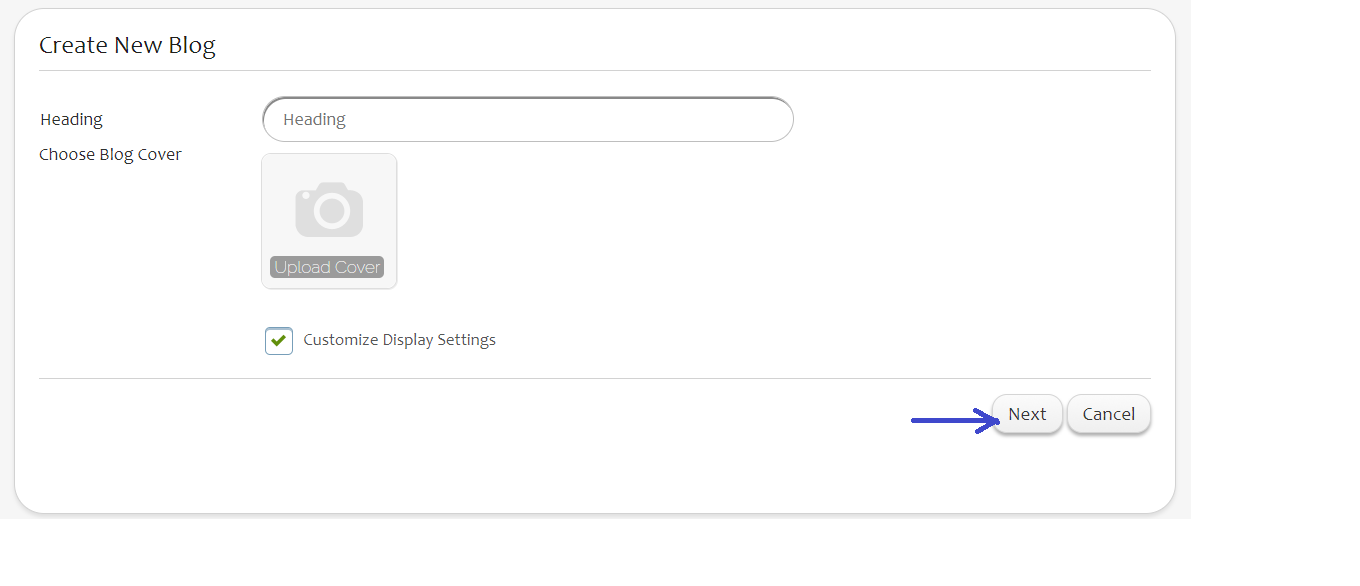
Step 2: Enter the new blog name. Select 'Customize Display Settings' options. Select the 'Next' button. | Step 2: Enter the new blog name. Select 'Customize Display Settings' options. Select the 'Next' button. | ||
| − | [[Image:Wiki_B3_Website4.png | + | [[Image:Wiki_B3_Website4.png]] |
Revision as of 23:28, 10 October 2017
The content display mode of a blog can be set to 'Website' mode.
Step 1: Click on B^3 icon. Select 'New Blog' option as shown.
Step 2: Enter the new blog name. Select 'Customize Display Settings' options. Select the 'Next' button.
Step 3: This page displays various settings that can be applied to the blog page. Select 'Website' or 'One Page Website' depending on the length of the text. Save the settings.
Step 4: Now add the blog post under this newly created blog. The post gets displayed in website format.


