Difference between revisions of "InGridApp/Features/Shapes for photo and video display"
Jump to navigation
Jump to search
| (2 intermediate revisions by one other user not shown) | |||
| Line 1: | Line 1: | ||
| + | *[[InGridApp/Features | <<Features List]] | ||
| + | |||
==Description== | ==Description== | ||
| Line 7: | Line 9: | ||
2. For Picture Insertion: <br>Go to ‘Media Insertion Tool Icon’ and then ‘Insert object from camera roll’. You can add an existing picture displayed in the list. Drag and drop the picture in the shape selected.<br> | 2. For Picture Insertion: <br>Go to ‘Media Insertion Tool Icon’ and then ‘Insert object from camera roll’. You can add an existing picture displayed in the list. Drag and drop the picture in the shape selected.<br> | ||
| − | [[File: ]] | + | [[File: Shapes_photo_video_display_1.png]] |
| + | |||
| + | |||
| + | [[File: Shapes_photo_video_display_2.png]] | ||
| + | |||
| + | |||
| + | [[File: Shapes_photo_video_display_3.png]] | ||
| + | |||
| + | |||
3. Ingrid also facilitates the user to insert a live picture through ‘Camera capture icon’.<br> | 3. Ingrid also facilitates the user to insert a live picture through ‘Camera capture icon’.<br> | ||
| − | 4. For Video Insertion: <br>Select ‘Camera Roll’ icon from the main page. Scroll to videos that show existing videos list. Drag and drop the desired video into the selected shape. | + | |
| + | [[File: Shapes_photo_video_display_5.png]] | ||
| + | |||
| + | |||
| + | 4. For Video Insertion: <br>Select ‘Camera Roll’ icon from the main page. Scroll to videos that show existing videos list. Drag and drop the desired video into the selected shape.<br> | ||
| + | |||
| + | [[File: Shapes_photo_video_display_4a.png]] | ||
| + | |||
| + | |||
| + | [[File: Shapes_photo_video_display_4.png]] | ||
| + | |||
| + | |||
| + | *[[InGridApp/Features | <<Features List]] | ||
| + | |||
| + | |||
| + | [[InGridApp | InGridApp Home]] | ||
Latest revision as of 04:28, 14 March 2017
Description
This feature allows you to display a photo, picture or a video in a desired shape. The shape can be resized as required.
How to Use:
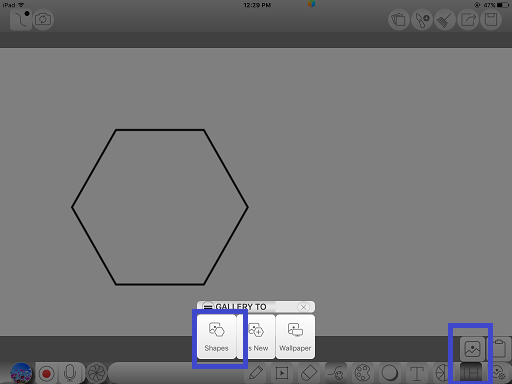
1. Open a new drawing page. Through ‘Drawing Tool Options’, select a desired shape.
2. For Picture Insertion:
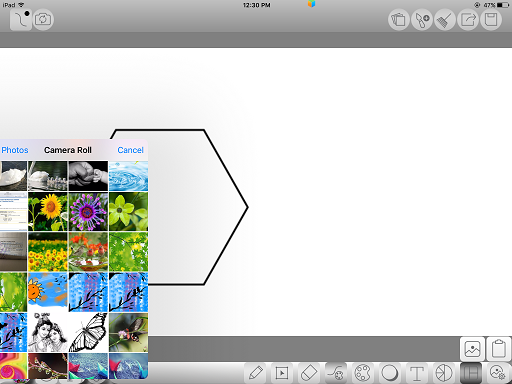
Go to ‘Media Insertion Tool Icon’ and then ‘Insert object from camera roll’. You can add an existing picture displayed in the list. Drag and drop the picture in the shape selected.
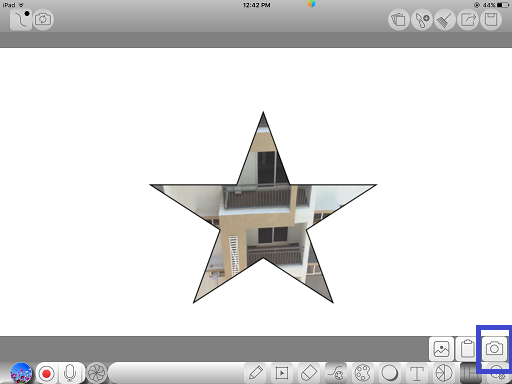
3. Ingrid also facilitates the user to insert a live picture through ‘Camera capture icon’.
4. For Video Insertion:
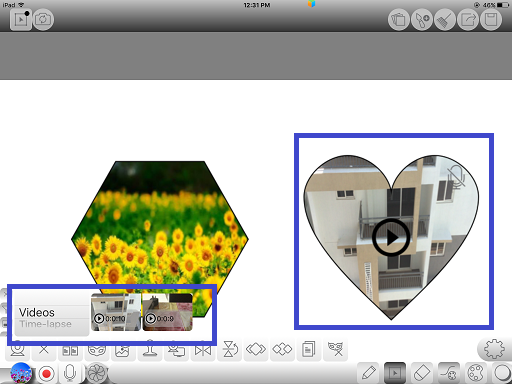
Select ‘Camera Roll’ icon from the main page. Scroll to videos that show existing videos list. Drag and drop the desired video into the selected shape.


